How To Test Your Soil Using A Mason Jar
Make sure to like Living Green and Frugally on Facebook, Shop at Amazon to help support my site and explore our PINTEREST BOARDS for innovative ways you can become self-sufficient.
How To Test Your Soil Using A Mason Jar! 🏺🌱
Ever wondered what’s lurking beneath your feet in your garden? 🌿 Your soil holds the key to your plant’s success, and testing it with a simple mason jar can reveal everything you need to know! No expensive kits, no fancy tools—just one jar and a little patience.
Get ready to uncover your soil’s true composition and learn how to improve it for a thriving garden! 🌻✨
Why Test Your Soil? 🤔
Soil isn’t just dirt—it’s the foundation of your plants’ health. Testing your soil helps you:
✅ Understand its composition (sand, silt, clay) ✅ Improve drainage and water retention ✅ Enhance plant growth by adjusting nutrients ✅ Prevent over-fertilizing or under-fertilizing ✅ Save money by knowing exactly what your soil needs
Knowing your soil type gives you a huge advantage when planting vegetables, flowers, or even trees! 🌳🌼
How To Test Your Soil With A Mason Jar 🏺
This simple soil test is 100% DIY-friendly and requires minimal effort! Follow these steps to analyze your soil like a pro. 🕵️♂️
What You Need:
✔️ 1 mason jar (or any clear glass jar with a lid) ✔️ Soil sample from your garden ✔️ Water (preferably distilled) ✔️ Dish soap (a drop or two) ✔️ A ruler (optional, for precise measurements) ✔️ A marker or tape for labeling layers
Step-by-Step Guide:
1️⃣ Collect Your Soil Sample
- Dig 5-6 inches deep in the area you want to test.
- Take a small scoop of soil and remove any debris like rocks or roots.
2️⃣ Fill Your Jar
- Fill the mason jar about halfway with soil.
- Add water until the jar is almost full, leaving about an inch of space at the top.
3️⃣ Add Dish Soap
- Add a few drops of dish soap to help break up soil particles.
- This step helps separate the different layers!
4️⃣ Shake It Up!
- Screw the lid on tight and shake the jar vigorously for 1-2 minutes.
- Make sure the soil is fully mixed with the water.
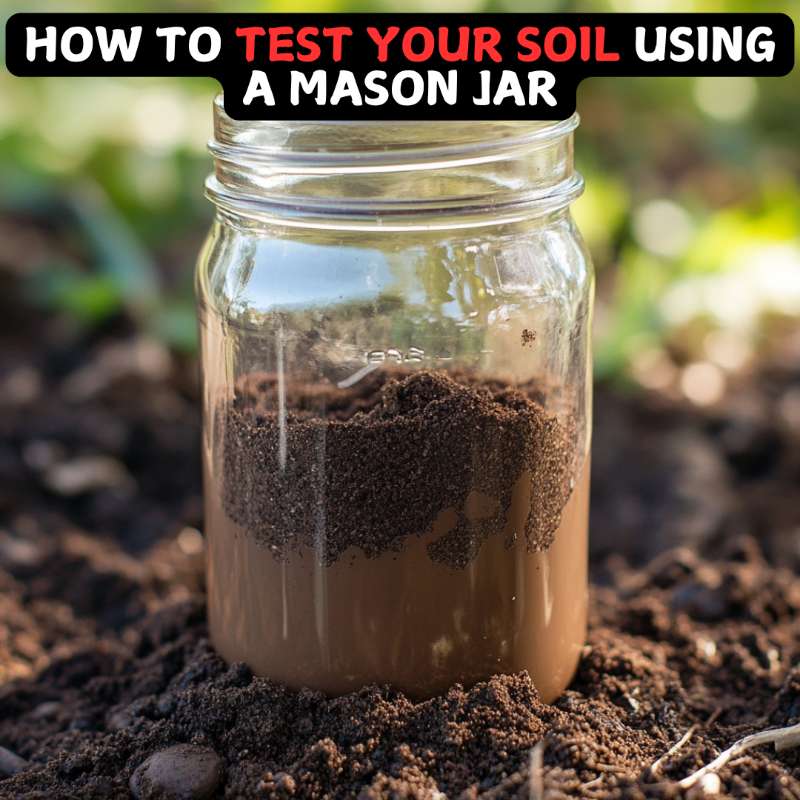
5️⃣ Let It Settle 🕰️
- Place the jar on a flat surface and let it sit undisturbed for 24 hours.
- The soil will separate into three distinct layers:
- Sand (bottom layer) – settles within minutes.
- Silt (middle layer) – takes a few hours.
- Clay (top layer) – may take 24 hours to fully settle.
6️⃣ Analyze Your Results 📊
- Measure the thickness of each layer with a ruler.
- Calculate the percentage of sand, silt, and clay to determine your soil type:
- Sandy Soil: 70% sand, drains fast, needs organic matter.
- Silty Soil: 40% silt, good fertility, can compact easily.
- Clay Soil: 50% or more clay, holds nutrients but drains slowly.
- Loamy Soil: Ideal mix of all three, perfect for most plants!
🔎 Tip: Use a soil texture triangle to get an even better classification of your soil!
How To Improve Your Soil Based on Results 🌱
Once you’ve identified your soil type, here’s how to fix common issues:
✅ Too Much Sand? Add compost, peat moss, or aged manure to improve water retention. ✅ Too Much Clay? Mix in organic matter like wood chips, compost, or gypsum to improve drainage. ✅ Too Much Silt? Add organic mulch to prevent soil compaction and erosion. ✅ Loamy Soil? 🎉 Congrats! Maintain its balance with regular composting.
FAQs: Common Questions About Soil Testing 🧐
1. Do I need to test multiple spots in my yard?
Yes! Different areas can have different soil types. Take samples from multiple places if you’re planning a large garden. 🌾
2. Can I do this test indoors?
Absolutely! Just make sure the jar is properly sealed when shaking to avoid a muddy mess. 😅
3. What if my water remains cloudy after 24 hours?
That could mean you have a lot of organic matter or very fine clay. Try the test again and let it settle longer.
4. Can I use a plastic container instead of a mason jar?
Yes, but a clear glass jar works best so you can see the layers clearly.
5. How often should I test my soil?
Ideally, once a year before planting season. If you add amendments, test again to see how your soil is improving! 📅
Final Thoughts: Get To Know Your Soil! 🏡
Testing your soil with a mason jar is an easy, fun, and budget-friendly way to take control of your garden’s success! 🌻 By understanding what’s beneath the surface, you can grow healthier plants, improve soil quality, and maximize your harvest.
Give this method a try and let us know what you discover! Drop a comment or share your results! 📸💬
Happy gardening! 🌱✨